On the Backs of Dragons

[SPOILER ALERT]

When I was twelve, I read Eragon by Christopher Paolini. I don’t know what got me through the second book of four, as I barely skimmed the books, believing it all to be a cool story that was sugar-coated in unnecessary purple prose.

Eragon_novel

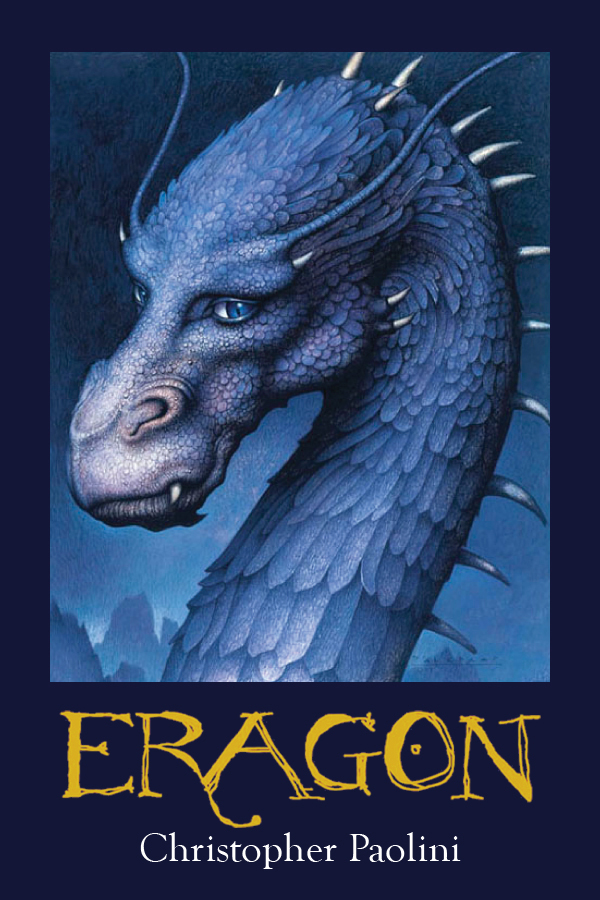
However, recently someone I look up to suggested I give it a read. It has been four years since I last read it, and I had even forgotten the name of the dragon (Saphira), so I took a trip to Half-Priced Books and snatched the first two books of the series: Eragon and Eldest.

Upon reading the first few pages of Eragon, I was sucked in. I fell in love with the poetical phrasing, the calming writing style, (which was not, in fact, purple prose as I had thought. That was just a discouraged twelve-year-old who wasn’t used to books more descriptive than Harry Potter. However, I heard that Paolini gets more prose-y with each book though, so I should probably hold my tongue for now.) and the conflicts.

Eragon is about a young teen boy (who shares the name of the book) who finds a stone in the mountains while hunting. It is, in fact, a dragon, who has been waiting for her destined Rider to touch her egg, and she, Saphira, hatches for him. They are able to telepathically converse among the two of them. However, the evil king’s servants, the Ra’zac, have been searching for the egg, and while Eragon is out, they burn down his entire farm, taking his uncle with it. Eragon, discouraged, runs off with the town storyteller, Brom, (who is later revealed to have been one of the original Riders. The Riders are told to have extremely long lives.) helps Eragon, teaching him magic and telling him of the history of the Riders while they hunt down the Ra’zac. However, their adventure becomes more than just revenge for Eragon’s uncle (and, later, Brom, too) – it becomes a question of alliances for Eragon as a Rider; what is he fighting for, if he’s fighting at all in the inevitable battle in the kingdom?

It is clear that Paolini is trying to create a Middle-Earth-eque world with languages, creatures, and attempting the writing style of Tolkein, but my number one criticism is that Paolini is not a linguist. He cannot create new words that sound as real on the tongue as Tolkein does. For example, “Ristvak’baen” (which means “the Place of Sorrow” in the Ancient Language) and “Galbatorix” (the name of the villain) do not achieve the “this looks like a real language” effect. However, that is my one criticism.

Engineering

I’m in high school, and I’ve been trying to settle on a major I want to pursue. I’ve leaped between dentistry, game design, and business with the failure to keep motivated on those majors. I knew I wanted something involving math and science, with a little bit of creativity if possible. Recently I asked my tutor, who helps me with my Chemistry homework and occasionally with my Algebra, and she helped me land on Engineering as something that is currently within my grasp and applies what I wish to have in a major. I was very excited at this idea, as Engineering seemed like something that was far beyond me. With this excitement, I started researching online, and found this wonderful site: http://www.engineergirl.org

The front page of the site EngineerGirl.org

The front page of the site EngineerGirl.org

I clicked on this site not expecting there to be much material, but there’s a lot: featured female engineers, scholarships, essay contests, a description of why one should become an engineer, clubs, contests, and my favorite part – the “Try On A Career” section, which features many different types of engineering, the skills and interests required, what they may be doing, and starting out salaries.

The few you see are the first of many in the list.

The few you see here are the first of many in the list.

For example, the Mechanical Engineering section will provide you with the information that mechanical engineers need to be good problem-solvers, good at explaining, work alone, and are realistic about how to get things done. The salary starting up in this field is $61,856, on average. What mechanical engineers will be doing include developing more fuel-efficient cars, creating prosthetic limbs, and building aerospace vehicles, like the Mars Rovers.

There are many forms of engineering, and it covers a wide variety of ideas and careers. While computer engineers are working on how to make their computers thinner and lighter, materials engineers are inventing clothes that keep you cool in the summer, and biomedical engineers are genetically enhancing vegetables to have more nutrients, and the literal rocket scientists (aerospace engineers) are developing safer space shuttles.

I have rather simple reasons for wanting to be an engineer: I love math and science. I get math and science. I love being pushed to my intellectual limits, and second-year Algebra isn’t stretching me as much as I’d like. I like working with formulas, facts, and logic, rather than debating what might be and what might not. But it also matches my wants for variety and a decent level of creativity. Engineering can range from space to clothes, to making the world better. So I can knock out making my dream socks and improving siren sounds so that people actually know where the ambulance is coming from in one go.

Behind the Scenes of the Radio

Many people grasp the idea of songwriting, even if they themselves do not understand what happens in music theory and crafting a piece of music. These people will picture someone who understands music sitting down and letting imagination flow, just as one does when writing a book. However, many do not have a clue as to how the production and mixing happen, or what it even looks like.

ableton step 1

This is Ableton Live. Say hi, Ableton Live. (Hi!) Ableton Live is a computer program, much like Photoshop or Microsoft Word, which is used to efficiently produce a creative work. While Photoshop is for images and Word is for writing, Ableton Live is for music. While Pro Tools is the most ideal and high-end music program, there are many high-quality programs which do the job almost just as well, including the “Big Three”: Ableton Live, Reason, and Logic.

ableton step 2

These are the tracks that are used. Each piece of music is separated into many tracks, just like Photoshop uses layers. A song, for example, may have an acoustic guitar, a piano, and voices all going at once. Photoshop will merge layers together into one image, but that doesn’t mean that there weren’t layers to begin with. These tracks are like those layers.

ableton step 3

In electronic music and production, a producer can select a sound or synth along the side bar, choosing between soft pads, dirty beats, energetic leads, and others.

ableton step 4

When a producer hits the record button, a sort of box grows, in which one can plug in a melody, beat or chord via MIDI. (MIDI is hard to explain, but basically it’s what allows a keyboard to play the same thing but with many different sounds.) On the top half of the screen, you see the layout of the piece of music, with all these boxes of melodies and beats. On the bottom, you can see the contents of one of these boxes. That melody you see there, with the notes plugged in, is what MIDI is.

ableton step 5

A producer can also fiddle with effects in the area in which you saw the MIDI melody before. These effects can change everything about what is being played. Effects are used for every purpose possible, while the vast majority of people only really know of Autotune. Effects can make things sound like it was recorded in a small closet or a vast opera house. Effects can make things travel from one ear to the next, or repeat itself distantly like an echo. Effects can make sounds sound shorter or longer, and can make things sound thicker or dryer.

After everything has been nit-picked for a while, a producer will sit back in satisfaction at the crisp-sounding mix and production.

Here is a piece I wrote, of which you can see the production in the previous photos.

“Where Are the Other Nineteen?”

One of the artists I adore is a pair from Ohio who have deemed themselves Twenty One Pilots. The two members are as follows: Tyler Joseph (singer, songwriter, pianist, ukelelist) and Josh Dun (who plays drums. It doesn’t seem like much to add to the table, unless you’re one for awesome rhythms and great drumlines in pop music.) They have approached music from a weird angle, with great variety in a single LP (album release). Fans often joke about how each song is almost a different genre. Many pop artists do not care to step outside their comfort zones for many song, but Twenty One Pilots has done so artfully, with no two songs sounding similar.

Above: Twenty One Pilots’s song Ode to Sleep has more variety in five minutes that the whole of a Top 40 radio station. In the first two minutes, it sets itself up with about three genres. (Electronic intro, rap verse, and happy boyband prechorus and chorus. Tempo changes are also included.) The music video shows their growth in popularity, from playing in front of twelve people four years ago to twelve thousand over the course of two nights.

Now, I don’t know about you, but I’m not one for rap. I don’t like rap. At all. All too often, the words to rap songs are sickly and disgusting, and the technique itself is unfavorable. Upon hearing Twenty One Pilots for the first time, I wasn’t hugely impressed by hearing the previews on iTunes. Months later, I looked them up on YouTube and read the lyrics along with Ode To Sleep, and my mind was blown, because they had something to say with these words speeding by so quickly, and these rap sections were placed over and around interesting synths, drums, and melodies. Dark metaphors of anxiety, depression, and a sense of hopelessness fly by at the speed of light. For example, in the song above, these words go by almost too quickly to catch:

“On the eve of a day that’s forgotten and fake
And the trees they await and clouds anticipate,
The start of a day when we put on our face
A mask that portrays that we don’t need grace
On the eve of a day that is bigger than us,
But we open our eyes ’cause we’re told that we must,
And the trees wave their arms and the clouds try to plead
Desperately yelling there’s something we need.”

There’s something enchanting about the words, the melodies, the variety, and the performance. I saw them play live back in October, and when their songs play on my iPod today, what was happening in the concert is still vivid in my memory, including the chills that ran down my spine and the adrenaline that coursed through me, especially during one of my personal favorite songs, Trees, which constantly builds in energy throughout the song.

Many fans think that not much can top Twenty One Pilot’s album Vessel, and with the release of their new single Fairly Local last Tuesday off their upcoming album, there has been controversy (the main criticism is rooted in the crisp and polished production sound) but most of the fans couldn’t have asked for more.

In short, Twenty One Pilots is hugely unique duo in mainstream music. They are worth the listen and worth the consideration.

Minecraft is a Futuristic Dystopian Game

I think it’s safe to say that I’m a bit of a nerd in that I love reading up on research or doing research myself. I’ve gone through “research the thing!” phases, including tsunamis when I was 9 and sharks (especially whale sharks) when I was 12. Right now, I love to see math/physics/logic applied to fantastical fictions such as video games and TV to show how WILDLY inaccurate they are; then proceed to overthink and run with the idea to answer the question that asks in what conditions would this work in real life? Recently I thought “Hey, why don’t I try it myself? It’s a very specific obsession, and there’s so little material on it.” So I thought I’d start with something simple: I’ve always been a bit skeptical about accurate measurements in Minecraft.

The developers have stated that one block is equal to one cubic meter. One meter is equal to 3.28084 feet or 3 feet 3.4 inches, so one block is about 3.28084^3, or 35.314 feet cubed. (That’s a huge block right there.) Each block is, by default, 16x16x16 pixels. One pixel is 1/16 meters cubed, which is a volume of .000244 cm^3, and each pixel is about .0625 centimeters in height. That’s a lot of numbers, so I’ll sum it up – Each block is one meter cubed, or 35.3 feet cubed, and each pixel is .000244 centimeters cubed, or .0625 centimeters tall (.024 inch tall).

Let’s just take a moment now to realize that Minecraft Steve and almost every zombie, skeleton, witch, villager, and monster in the game are all two blocks tall (32 pixels) or about 6 feet 7 inches in height! However, Google contradicts this; it will tell one that Minecraft Steven is 6’1″, or 1.85 meters, but that would mean that each block is actually .925 meters tall, and each pixel would be .057 centimeters tall (as opposed to the .0625 centimeters). So which is right? Ever since the creation of the game, it’s been established that each block is one meter cubed, and that’s a nice round number, so let’s run with that for a moment.

If it was just Minecraft Steve who was 32 pixels, it wouldn’t really be notable that he’s actually very tall. But because this is the height of almost everything else in the game, it’s an epidemic. The average man’s height is 5 feet 10 inches, so everyone in Minecraft, living or dead, is nine inches taller than the average man today. Isn’t that a bit odd?

In the mid 1800s, the average man was 5 feet 5 inches, so we are going to do some math. 5 feet 5 inches is equal to 65 inches, and 5 feet 10 inches is 70 inches. 70 divided by 65 is equal to 1.077, or a 7.7% growth over 150 years. The equation for continuous exponential growth is A = Pe^rt, when r is the rate, t is the time in years, P is our original number (in that case, it’s in inches), and e is a constant. Let’s plug in the numbers.

maths minecraft

81 inches is equal to 6 feet and 9 inches, so we’re looking at a world shortly before the twenty-fourth century, or in the late 2200s.

I think that’s an interesting idea to explore – Minecraft taking place in a post-apocalyptic world with the risen dead in the form of corpses and skeletons, and the small population that is left is scattered in the form of isolated villages or loners.

Despite this post-apocalyptic idea, the Minecraft world is surprising natural and city-free. Well, it takes about 20 years for a forest to regrow after a fire, so it isn’t much of a stretch to assume that in nearly three centuries the world could be a lush, green place. Sadly, I couldn’t find any research on how long it would take for a forest to replace a burned-down city, but it only took googling “abandoned towns” and scrolling through the pictures to realize that these un-burned towns are already being taken over by nature; trees bursting through the roofs of houses, plants overtaking the walls and rooms… A burned-down city would be even less in the the way for the plants to move in.

e99cfbaa7a4966e72cc80878bf43382e_970x

So let’s recap – Minecraft is a world which takes place nearly three centuries into our future, in which a unknown cause has burned down our cities and raised the dead (not to mention artificially grown our spiders to terrifying sizes), and the few people who have survived are forced to scatter and survive. Sounds like every dystopian franchise ever to me. No wonder it’s popular right now.

I know that sounds like a bit of a stretch, but the other option is that the blocks are actually .925 meters tall and have 79% the mass (.925^3 = .79m^3) of the assumed 1 meter cubed and Minecraft is just another world. (Yawn.)

mc

P.S. Talk about a rabbit trail. I meant for this post to be about how large the rabbits in Minecraft were, based on pixel measurements. Oops. (Hint: they’re 3.3 feet long by 3.3 feet tall. The largest rabbit recorded in our world is 4 feet long and 55 pounds. The more you know!)

A Trip to Jupiter (Space Digital Art)

Recently I designed myself a new header for Twitter. I thought it was about time, as my old one was a few months old but inaccurately represented my Photoshop skills. (One can grow a lot in a few months, don’t you think?) So I sat down and thought “What on earth should I draw?” and decided to do something I had not attempted before: one hundred percent landscape. Actually, it wasn’t landscaping. It was space.

“Okay, so I’ll have gorgeous stars and swirling nebulae in the background and I’ll also have Jupiter, Earth, and the sun in it!” I went into this project expecting a horrible failure, as I had attempted stars once before and other than that, I was a beginner. But I was dedicated, and achieved good results. *Throws a party*

Let’s start with the color of the background. Very few things are pure black or pure white, unless the artist wants to achieve a very mysterious, unsettling appearance. If you look closely, the color I picked was a near-black shade of purple. It’s close enough to black, but just far enough as well. Then, I created a new layer as I pulled out my white pen tool. I tapped all over the piece, varying between a three pixel pen tool (larger stars) and a two pixel pen tool (smaller stars.) (I also drew in Orion, with a four to five pixel pen tool.) The stars are very spread apart where I plan on putting the sun. When drawing stars, never let them be equal distances apart. The layout of stars appears almost random, with clusters and spread-out areas.

1 space

White stars are not the only kind. There are also blue ones. These will add depth.

2 space

These stars look nice, but there isn’t enough light to them. An easy way to achieve a glowing look is to duplicate the layers, then add the “Gaussian blur”, which spreads out the pixels to appear like it’s lit up.

3 space

This is what the image looks like with just the Gaussian blur layers.

3 z2 space

I also mentioned wanting to add swirling nebulae. I will add those, very subtly, by painting with purple, blurring, and lowering the opacity of the layers. A faint glow coming from the left side of the piece will help enforce the glow of the sun. This is what these blurs will look like.

4 space

This is what the piece currently looks like.

5 space

Now I will proceed to add the sun, Earth, and Jupiter. I create the bases for these by adding spheres. As you can see, I added a slight Gaussian blur to the sun’s sphere. (Part of creating digital art is learning that Gaussian blur is your “very very bestest friend.”)

6 space

To achieve the full glow of the sun, we need more than one duplicate layer for the Gaussian blur. Gaussian blur allows you to expand the radius, but with a fainter appearance. Here, I have a layer with a two-pixel Gaussian blur (the most visible circle), a layer with forty-pixel Gaussian blur (the most noticeable glow), and a layer with a ninety-pixel Gaussian blur (which adds a larger but very faint glow that spreads out further. This adds a nice touch.)

7 space

Now, using the paint tool, we will create the pattern on Jupiter. Using many effects, such as blur and a few stylizing effects, we achieve a Jupiter-eque appearance.

8 space

Let’s create a dark brown shading across the right end of the sphere, then lower the opacity for a nice, subtle shading for some depth.

9 space

Similarly, we will paint the continents onto the Earth, then add a shading layer.

010 space

Because I am one for detail (if you haven’t already noticed with the fact that I added the Orion constellation), I will add lights on the night side of the Earth by using a one-pixel white paint tool (with a bit of blue and yellow), then duplicating the layer with one pixel of Gaussian blur.

011 space

After adding Mars in the distance, I have completed my space art.

012 space

Click me for full size!

To Draw a Cutie, Part Two – Refining

In my previous post, we learned how to draw the outline for an adorable Chibi. I discussed different styles, facial structure, and how to draw hair. The result:

5 chibi

This chibi is far from done. I want this chibi to not have an outline, thus what proceeds is a very painstaking and boring process of coloring inside the lines, hiding the sketch layers, and using the eraser tool to make the edges more smooth. Below are a few pictures of what the process looks like, but it’s worthy of a fast-forward button.

6 chibi part 1 6 chibi part 2

6 chibi part 3

I still have yet to find a way to do that part quickly, but for this chibi, it took about ten minutes to do all the colors, which isn’t too bad.

7 chibi

However, the above Chibi looks very, very flat. Unfinished. (Hint: it’s because it is.)

One of the hardest parts of shading is choosing the right colors. I still have yet to get a grasp on basic color theory (…something about how shading is not just a darker version of the same color, based on warm or cool lighting… however, when I try to apply that, I get a really muddy look.)

8 chibi shading choose

My light source is coming from the top left corner, so I need to try to take into consideration what will be hidden from that light. I shouldn’t be just shading the bottom right corner of everything. For example, shade should fall behind locks of hair that frame the forehead.

9 chibi

I will proceed to shade the rest of the character this way.

010 chibi

That shading shows where the light is coming from very clearly, but the shading is still stiff and unfinished. I will do a “secondary shading”, which is when I shade using the same colors over a larger area, but then I play with the opacity to ensure a more complex and aesthetically pleasing shading.

011 chibi

This shading is still blockish and looks unfinished, so I will use my smudge tool (which can smear these crisp edges, allowing a smoother shading.) The shading will still capture the light as well as it did in the above picture, but will look more complete.

012 chibi

Hmmm, what am I missing? Oh yeah, facial features! Those eyes are still dead, and we can’t achieve the mouth with shading, so we’ll have to do a little line for that.

013 eyes chibi

The eyes are a very important part, so let’s look a little closer. There are so many ways to create eyes. Some techniques are more popular than others, but here is my personal style.

013 chibi eyes part 2

First, I frame the outside of the eyes with a darker version of the eye color. (Ignore her demonic-looking gaze over these steps.)

013 chibi eyes part 3

Draw the pupils.

013 chibi eyes pat 4

I draw one large highlight and one small highlight opposite each other, with an even more pronounced highlight inside the large one. At this point, use the smudge tool to smooth things out.

014 chibi

Look! She’s done! However, every artwork needs a backdrop. A lot of effort or a little can be put into this background. Because my sole purpose of this piece of art was to draw the girl without any sort of context, I didn’t put much effort at all into the background, but the soft colors (as opposed to the painful white) will make the viewer feel more comfortable observing the piece.

015 chibi done

To draw a Cutie Part One – the stylized sketch

I am an artist, but I am a very impatient one. If I can’t get a piece of art done in less than a few hours, I rush through to the finish or give up completely, which results in some art which had less quality than I had wanted. My impatience has led to my love of the Chibi style. Chibis are very cute and stylized characters in art, and often the easiest and quickest to pull off as an artist. The interesting thing about Chibis is that despite being defined as a style, there are so many styles within Chibi. Each artist has his or her own style, but all with the same defining features: large head, small body, and large eyes. Some decide to draw fingers on theirs, while some decide to end the arm with a cute little stub. Some put great detail into theirs, while others will make theirs as cartoonish as possible.

To draw a chibi, we start about as simple as humanly possible. A large circle is always drawn for the head, and often an outline as to where the limbs will go will be drawn, like below.

1 chibi

This chibi is not going to be a stick figure, so I will proceed to draw limbs. (As you can see, I am one of those artists who prefer stub arms.) We want an almost toddler-ish look for this body.

2 chibi

Now I’m going to be more specific in my sketch. A horizontal line and a vertical line across the face show where many of the features will land. The eyes, which are usually drawn as large ovals that are flat on the bottom, will sit on top of the horizontal line, on either side of the vertical one. The nose may appear right at the intersection or just below it. Also on the below sketch, I have drawn a dress.

3 chibi

Hair likes to grow in locks, which is something for which artists are largely grateful. Drawing each individual hair grows old really quickly. You can imagine a lock of hair to be like a curved triangle. It’s thicker at the bottom, then becomes a point at the end. The key is to make sure nothing is perfectly straight, or else the hair will look very stiff. A good way to avoid stiff hair is to give it a blow-away look.

4 chibi

Our drawing is almost done! I like to draw darker lines over my original sketch to detract attention from the lines which were necessary for the sketch (such as the horizontal and vertical line across the face) but are no longer needed. I will proceed to choose colors. Below, from top to bottom on the pallet, you will see the colors I picked for the skin, the dress, the hair, and the eyes.

5 chibi

My sketch is finished. I know where this piece will proceed, so now seems like a good time to reward myself with a cup of tea and return to this later. You should get a cup, too.

Cubes, Cubes, and More Cubes

I’ve met two kinds of people when it comes to Minecraft. (Wellllllllll, three. The third being the people who hate it with every fiber of their being because its popularity has lasted this long.) The two kinds of people I am referring to are the ones who know every corner and every trick of Minecraft, and those who have really no clue what’s going on, except that there’s a lot of cubes.

Lots and lots of cubes.

I just recently got into Minecraft, so I am not yet part of the first type, but I am far from the second type. I find it a very interesting and wonderful game, as it is well-made and encourages great amounts of creativity, from architecture inside the game to art and animation outside of it. Let me explain.

Let’s start with the very basics. The whole game is designed in cubes, with an 8-bit appearance, but in 3D. You are plopped into a randomly-generated world of these cubes, and can appear in any sort of biome – desert, grassland, mountains, swamps, islands, etc. It is the goal of the game to survive and constantly improve the state in which you live.

On the first day in the game, you have to collect materials in order to build a quick home or dig a hole in the ground so that you can hide at night, because the instant daylight leaves, many different types of monsters spawn. There are zombies, witches, skeletons, “Endermen”, and many others, including the infamous Creeper (a plant-like creature that walks around and will explode if they are near you. They can be a great disadvantage if they decide to blow up your house or you.) If you are safe in a small, lit-up, and protect spot, you can wait until daylight comes back to emerge and then start working on improving your defense and lifestyle.

You can capture animals and breed them, and plant wheat and flowers to feed them. You can cut down trees to make your house out of more sturdy material. Also, you can make weapons such as swords to defend yourself and make a pickaxe to start digging deeper and deeper into the earth for better materials (hence the name Minecraft.)

The goal of mining is to get better and better sources for armor and weapons. The deeper you go, the better stuff you can find. Stone and coal are near the top, and iron can be found deeper down. Then you can find gold and emeralds even deeper, but diamond is one of the rarest and most ideal materials to make armor and weapons out of.

Throughout the game, one needs to find ways to keep himself or herself fed, defend himself/herself from monsters, maintain a mine, and aim to have a home that gets progressively better. As this game has been out form about five years, many people have elaborated on it and built giant castles with villages, created modifications to the game where there are more monsters, and make ways that people can play Minecraft Hunger Games or other minigames with other people around the world. Minecraft is an odd game in that it has so much material to work with that good artists and animators can get a decent following on the internet with their creativity.

(Above: Slamacow is an animator who has received moderate popularity for his Minecraft animations which feature an unlikely trio: a guy, a zombie, and an Enderman.)

Digital Art Process

What is digital art? What is it really? Is it when some computer geek with Photoshop decides to take advantage of the technology at his or her hands and calls it art?

In fact, digital art is a unique process that requires both artistic skill and the ability to work with technology. I am an artistic hobbyist, and digital art appeals to me in its convenience and variety, and as a decent artistic medium.

In order to familiarize you with a visual art, what better way is there than to use visual representation?

One of Photoshop’s many glories is its layers – a convenience worthy of a HALLELUJAH.

layers

This is what the layers looked like for a recent piece I did, which I will be explaining step-by-step. The layers allow one to change some aspect without changing others. For example, while I struggle with how to make the eyes look good, the background would be untouched if I were to use an eraser tool as I angrily scribble on my Wacom tablet. It also allows the sketching process to happen easily.

Let’s say I want to create a piece of art, in a style called Chibi (which has exaggerated body proportions and is just cute overall), of a little kid leaping to attack another unassuming kid with a sword. The first thing I would do would create a very rough sketch, which is there mainly to show where everything will be in the final piece. Nothing in this rough sketch is final.

attack step 1

After I have created the rough sketch, I will create another sketch on a layer over it, which is more specific (while still being unofficial) and fixes any problems in the rough sketch.

attack step 2

The next step is to create another layer and draw the lines that will stay on the art.

attack step 3

It is at this point that I will “hide” the sketch layers, which makes them invisible. After I have drawn the outline, I will create another layer for the basic colors (no shading).

attack step 4

Things are starting to piece itself together now! The next step is to create shading on a new layer to make things POP. My idea is to have the light source be coming from behind the leaping kid, so I will create shading to fit that light source.

attack step 5

A very minute detail must be completed before the art process continues – the eyes.

attack step 6

These kids are coming to life now! Along any step of the way, the background can be created. A lot of tools (including smearing, blurring, and opacity, which determines how see-through a layer is) can be used in this process.

attack step 7

Here is my background with the sketches on top of it. Earlier I mentioned that I would create a light source behind the leaping boy. Using the same tools that I used for the background, I create a beaming light source.

attack step 8

With the background, lighting, and characters in check, my art has been completed. All that’s left is to leave my initials in the corner.

2-2-15 attack

The process of digital art is very fascinating. It is just as unique and worthy a style as painting, sketching, pottery- anything. It requires not just abilities with a computer, but with a pen, too.

photoshop

What this piece looks like in photoshop.